Android AnyConnect Installation
GhostArc uses AnyConnect to provide easy to use VPN services that are supported in Android and can be automatically updated each time Cisco publishes an updated application on the official Play store. To use the AnyConnect client on your Android device, follow these instructions:
The first step is to generate and install the certificate that will be used to authenticate your device to the VPN server, after which you will install and run the AnyConnect VPN client software. It is easiest to perform the process of creating your certificates on the device you want to install them on.
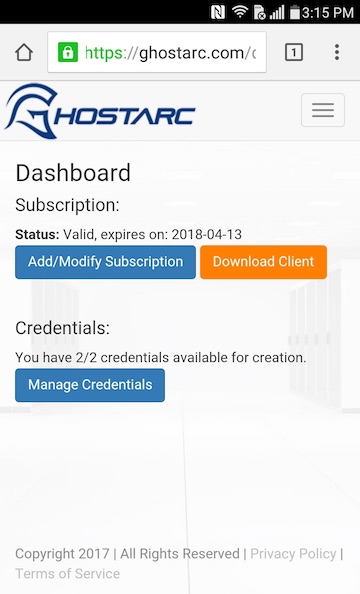
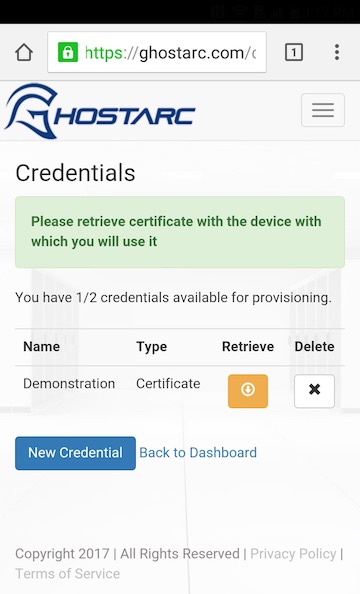
From the Ghostarc dashboard, click "Manage Credentials."
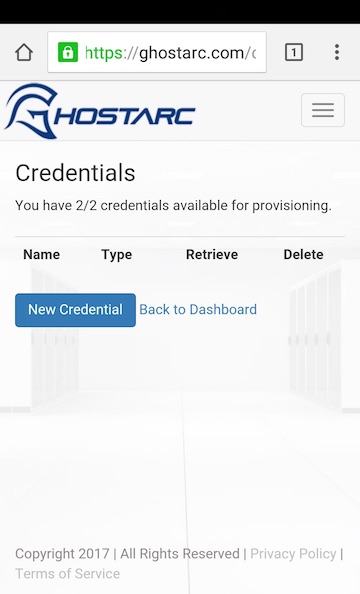
Click the "New Credential" button to proceed.
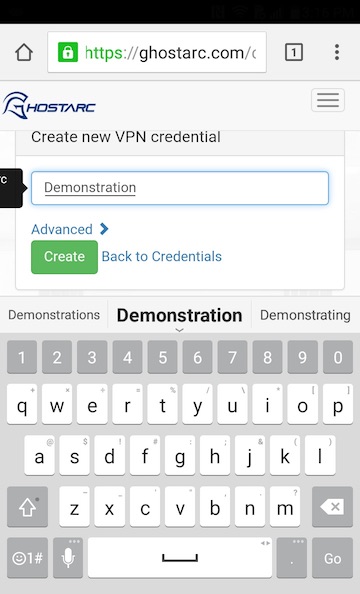
Choose a name for the VPN certificate bundle. We recommend choosing a name that will help you remember which device you installed this certificate on in case you want to change it later. You can use up to 64 characters, spaces are not permitted.
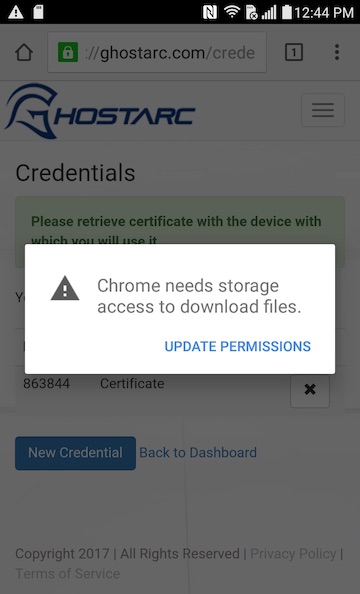
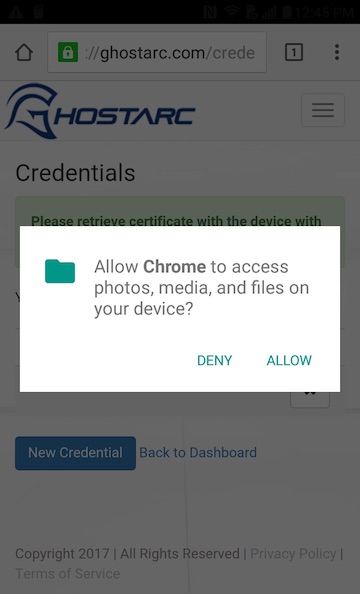
Click The orange button in the retrieve column to download the certificate bundle onto your device. On Android devices this process will require you to grant permission for your browser to write files.
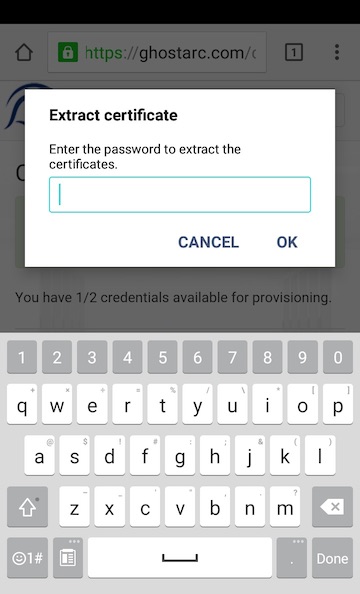
When prompted for the password, entire "GhostArc" and then click OK.
Tap.
To Proceed with installing AnyConnect, either click the Download Client button in the dashboard, or manually open the Google Play Store on your Android Device.

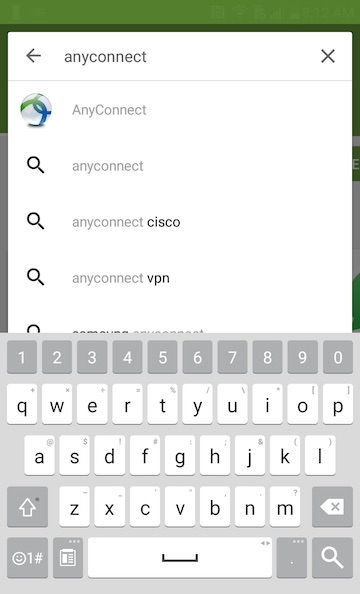
Tap the search field, type in "Anyconnect", and tap on the first result, which has a white circle icon with blue and green bands as shown as the first result below.
When the page below appears, tap the install button to proceed.

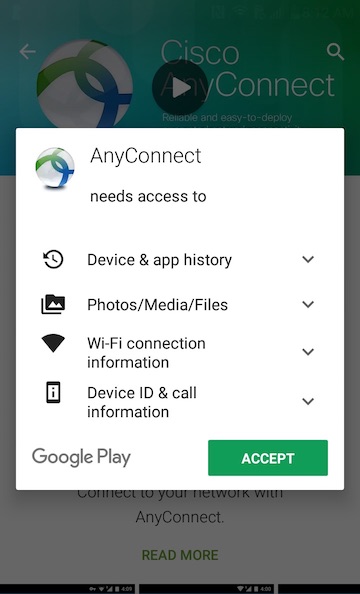
You must now grant AnyConnect the permissions that it will require in order to run. Tap accept when presented with the permissions request shown below.
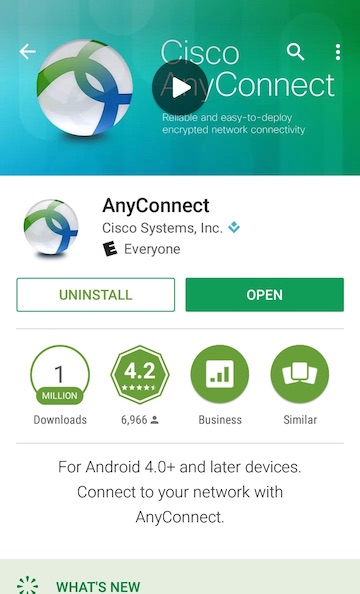
The Google Play Store will show "installing" briefly, and then update to show uninstall and open buttons as shown below. Tap Open to proceed.
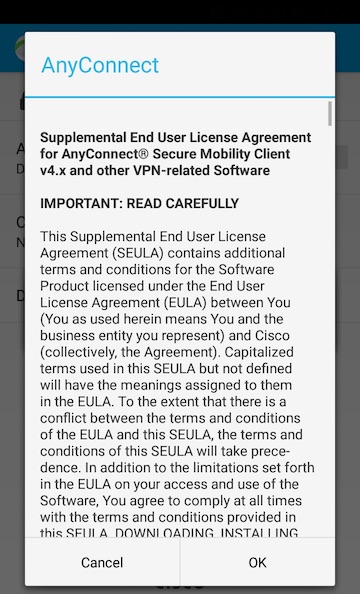
The first time you run AnyConnect, you will be asked to accept a license agreement from Cisco, as shown below. Tap ok to proceed.
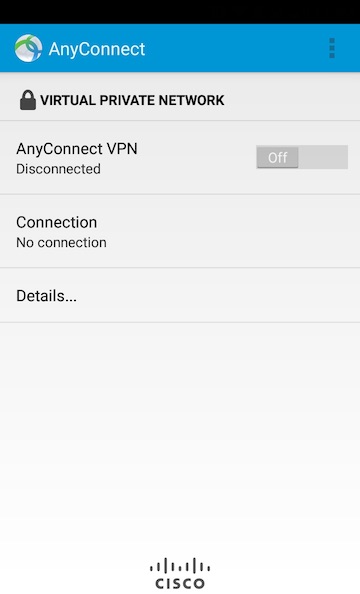
To connect to the VPN for the first time, click where it says "Connection/No connection" as shown below."
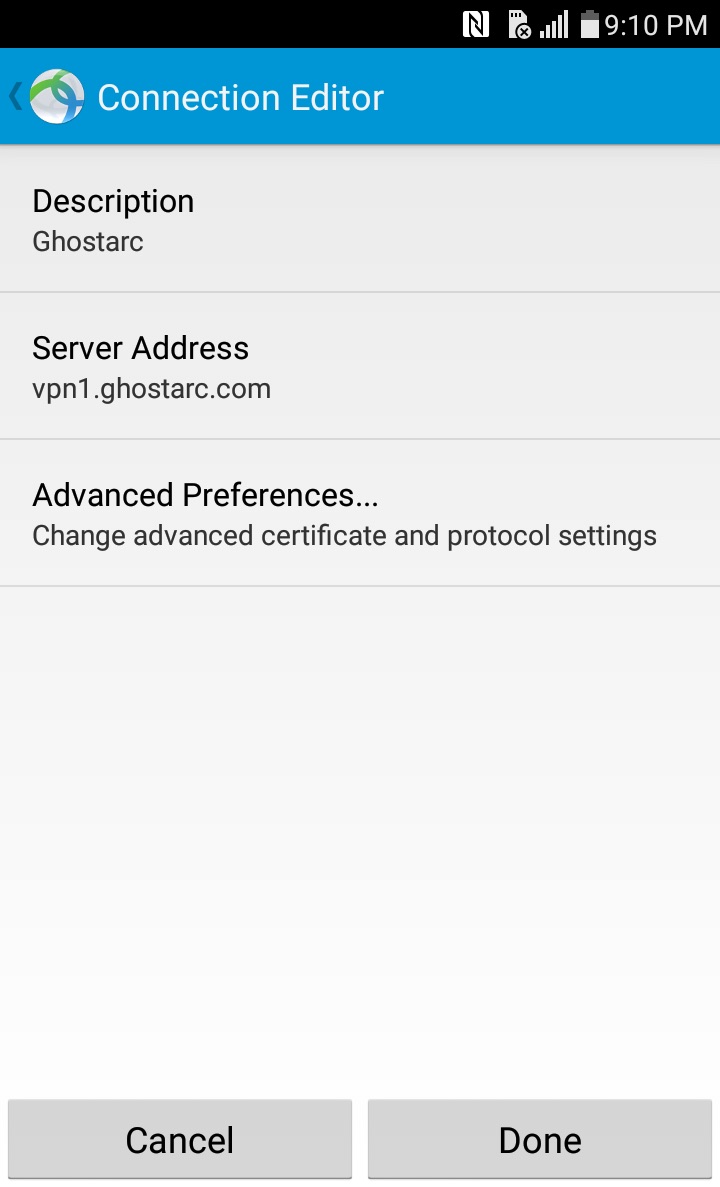
Click on "Add New VPN Connection..."

Fill out the fields the same as shown below and click "done."
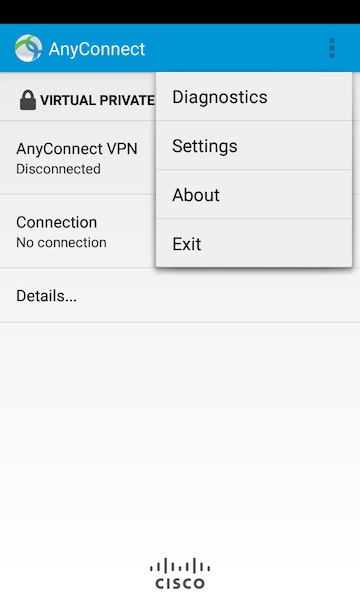
The next few steps load the certificate that was downloaded earlier into AnyConnect. Tap on the three dots in the upper right hand corner and choose "Diagnostics".
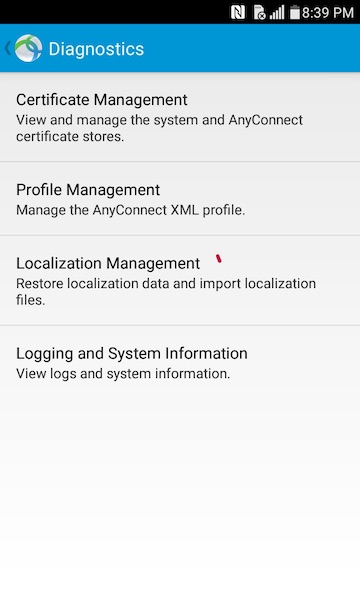
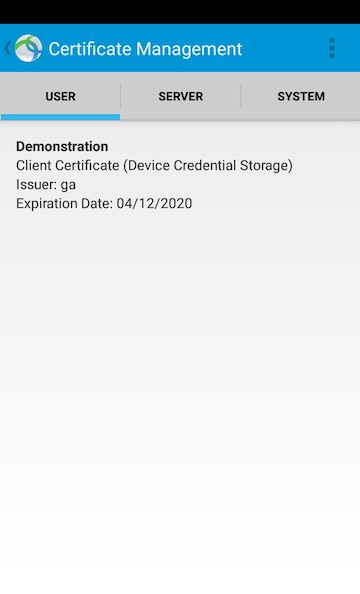
Choose "Certificate Management" to proceed.
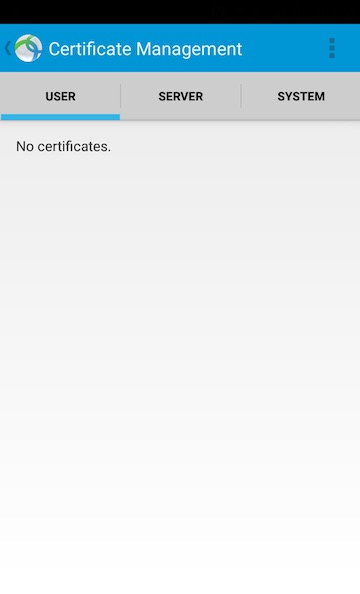
If this is your first time setting up a connection, the screen will show no certificate under user.
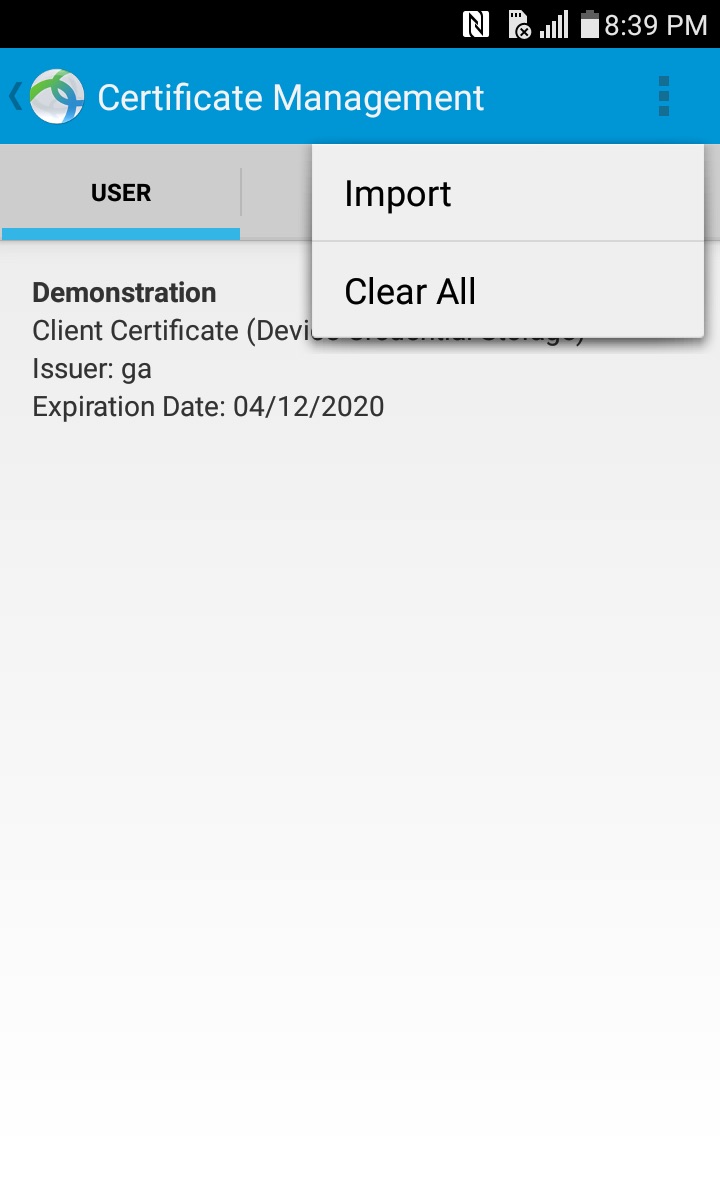
Click the three dots in the upper right and choose "Import."
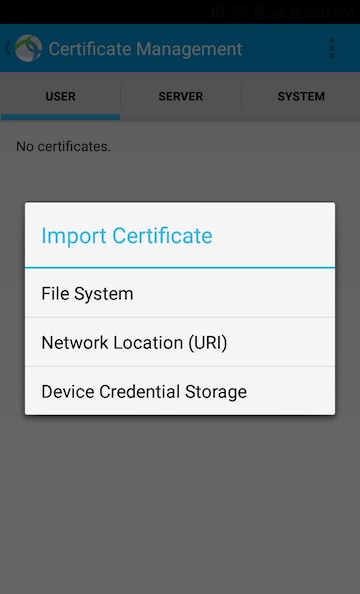
When the menu appears choose "Device Credential Storage."
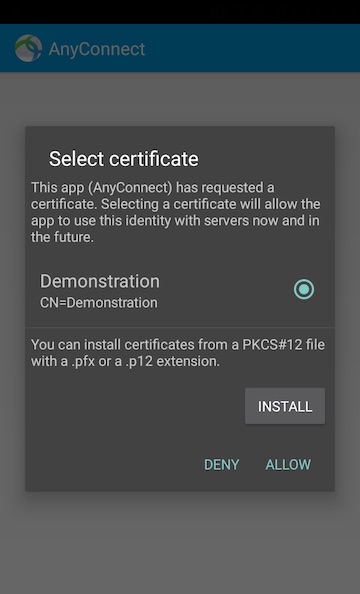
Click the circular button to the right of your recently created certificate and click "Allow." Do not click the "Install" button.
You will be returned to the Certificate Management screen and should see your certificate under the user section now.
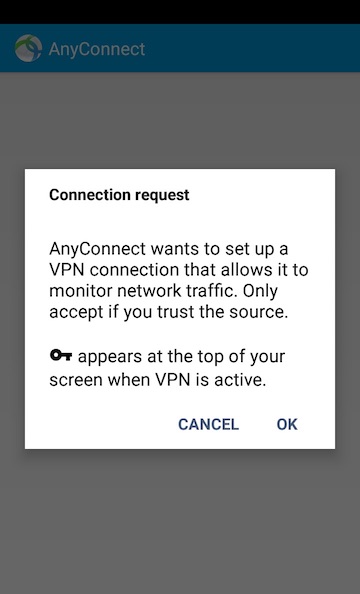
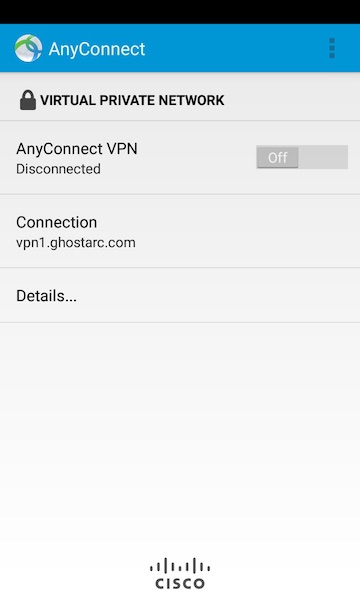
Click on the off switch to start the connection for the first time!
Leave the group setting on connect, and then Click "connect."
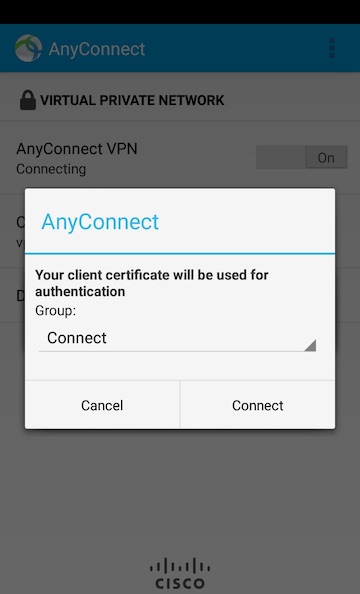
On the first connection only, you may be prompted to give the AnyConnect permission choose "OK"