Windows AnyConnect Installation
GhostArc uses AnyConnect to provide easy to use VPN services that are supported in currently maintained versions of Windows, and can be automatically updated each time you connect your Windows computer to any of our VPN appliances. To download and install the AnyConnect client on your Windows system, click the download client button when logged into your account dashboard, and then follow these instructions:
While logged into the dashboard on the website, create a new credential by clicking the manage credentials button. If you are using a browser on your Windows system, you will automatically receive a file with a .P12 extension. This file contains your encryption certificate for authenticating to our service. Double click on the .P12 it to proceed with installing your certificate.
The icon for the .P12 should look like the one below.

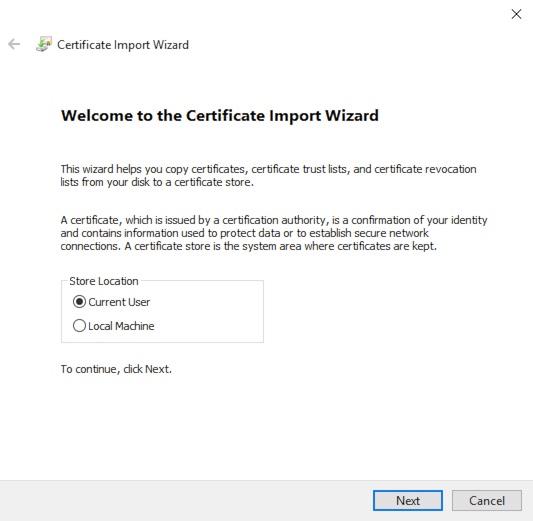
The Windows certificate import wizard will start and show you a window like below. Make sure "Current User" is selected and click Next.
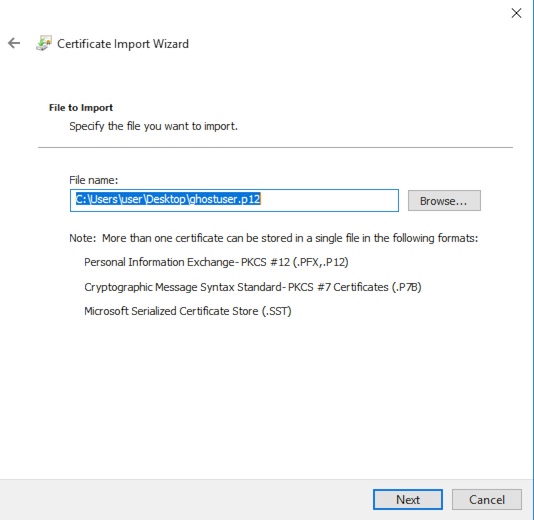
The Windows certificate import wizard will ask which file you want to import. Since you have already opened the file, you can just click Next.
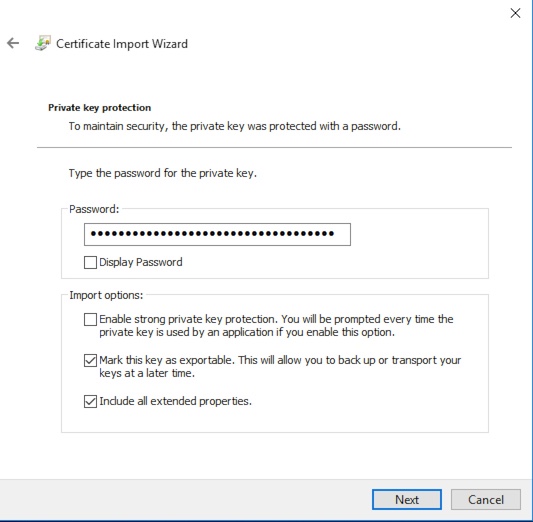
The Windows certificate import wizard will prompt you for a password, leave this field blank. Tick the box for "Mark this key as exportable." This will import your private key that is used to authenticate to our servers. Click Next to proceed.
Make sure that "Automatically select the certificate store..." is selected, and then click Next.

The Windows certificate import wizard will ask you to confirm the installation. Click "Finish" to complete the process.

The Windows certificate import wizard will report success. Click "Ok" to continue on to installing the VPN software.

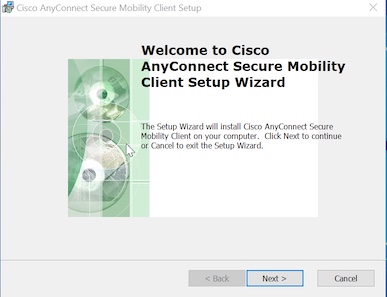
From your downloads folder, run the AnyConnect installer that you downloaded earlier when you clicked the download link from your welcome email. You will see a window appear like that shown below.
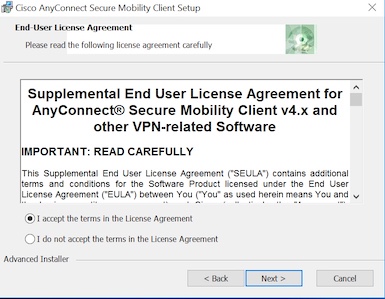
You will be prompted to accept the license agreement for the Cisco AnyConnect client. Click the radio button to the left of "I accept the terms in the License Agreement" as shown below, and then click "Next" to proceed.
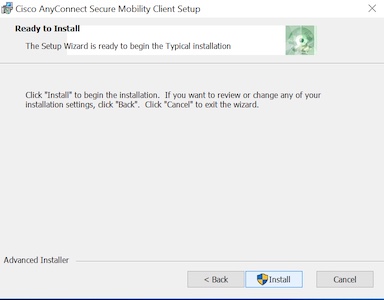
When the installer window appears as shown below, click the "Install" button. You must be an administrator on your computer to install AnyConnect.
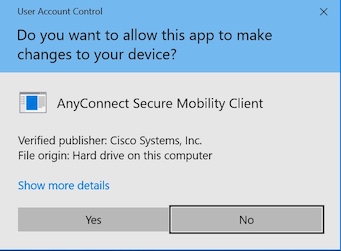
You will be prompted by Windows, as shown below, to allow the installation to continue.
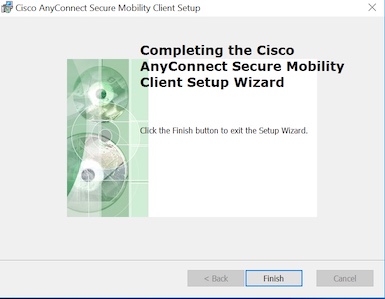
Click "Finish" as shown below to close the AnyConnect client software installer.
Click on the Windows icon and you will see the "Cisco AnyConnect Secure Mobility Client" in your "Recently Added" programs. Click on it to start the AnyConnect client.

You will see the window below appear. Enter the VPN server address and click Connect to proceed. The example address shown below will work!